
 Share
Share


Having a lush and beautiful lawn is a dream for many homeowners.
However, the average lawn is full of pitfalls and problems often arise.
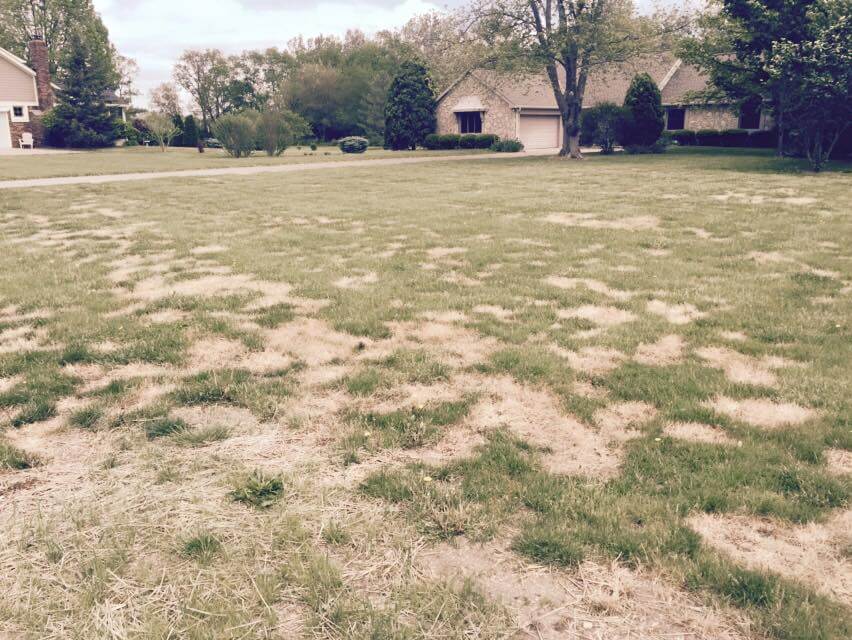
One of the problems that homeowners often face is brown or dead spots in the lawn.
Here’s the deal, although these spots are unsightly...
There are a few simple ways to treat brown patches in the lawn and restore the lawn to it's once lush glory.
Let’s find out how...
Identification Of Problem
This is crucial, it is important to identify the source of the problem before you can treat it!
Brown patches in a lawn can be the result of many things:
Mold,
Insect damage,
Even rodents.
Identifying the problem will allow you to specialize the treatment.
If you are experiencing patches in your St. Augustine Grass go here.
Local garden shops will carry supplies that will treat most of the causes of brown patches in the lawn. But if that doesn’t work, or doesn't seem like a viable option...
You may have to replace the lawn. Or at least the affected area.
 Replacing The Lawn
If the treatment of the area is a failure or the area is too large for the treatment needed. It may be necessary to remove the damaged areas and start the lawn from scratch.
If that is the case, you will want to follow these steps.
Step #1: Prepare The Area
The best way to prepare for new grass or sod is to completely dig out the damaged area to a depth of 4". Don’t remove too much soil. Removing only a few inches will be all that is required.
Next you will want to fill this area with a quality compost and nutrient rich soil. The soil should be loose, and not full of air pockets and voids. Nor should it be too compact. You want to be sure that the new lawn isn’t going to sink and leave a dip.
Good news! There is an easy solution, water the soil. When the soil is watered, it will compact naturally.
Additional soil can be added after a light watering.
Now that you have prepared the area. You will want to use seeds or install sod to replace the lawn.
Step #2 Choose Your Method
Method #1: Sod
There are a few options when it comes to gaining a lush lawn. Installing sod is a more expensive way to gain a lush lawn, but it is instant and requires little additional care above watering.
If there is a problem with a sod yard, the affected area can be removed easily and replaced with a fresh and healthy piece of sod.
Sod comes in long thin rectangles that are rolled up like a jelly roll. Cutting the precise sized replacement piece is simple when using this method.
Benefits of Sodding: Fast application, instant results, less watering.
Cons of Sodding: More Expensive, grass type limited by local availability.
Method #2: Seeds
The other option planting seeds, takes longer and requires more daily care until the root system is established.
However, the cost of seed is measurably lower than sod. Best of all you can use nearly any variety of seed. Different seeds can be purchased in a variety of grass types. Grass seed can vary by purpose, germination period, and weather zone.
Spread grass seed lightly across the area which is being replaced and then water gently.

For the best results, many people choose to lay a specialized cover or old straw over the newly seeded area. This is used to protect the vulnerable seeds from birds and the damaging effects of being exposed to the sun.
Most importantly, this cover also helps to keep the moisture in the ground, which helps the seeds to sprout and take root.
Benefits of Seed: Cheaper option. Nearly unlimited variety of grasses to choose from.
Cons of Seed: Takes longer to establish, requires more care and water.
Protect And Care For Your New Grass
After replacing damaged spots with either sod or seeds, it is important to protect the area until it is hearty and established.
Here are some tips to preserve your new lawn:
Stake off the area from foot traffic with wooden stakes and running a string around the area.
Do not cut the new grass until the root systems are securely and firmly in place.
Water often enough that the seed or sod does not dry out, but is not drenched or in a pool of water.
Do not use fertilizers with an NPK number.
Use an Eco-friendly and gentile fertilizers such as a natural seaweed fertilizer.

What’s the Bottom Line on Repairing the Lawn?
Simply put, having the lushest lawn on the block is possible by replacing the ugly brown spots with new lush green growth!
Removing and replacing damaged or dead spots in a lawn is as easy as:
- Identifying the problem,
- Removing all damaged areas,
- Laying sod or planting seeds,
- Protecting the new grass until it is established.
With this knowledge now in your lawn care file, now you know how to repair those dead spots in the lawn!
Be sure to mow your lawn properly and follow the best lawn care practices to avoid the recurrence of brown patches.
And if you need help at any point when caring for your lawn or repairing the lawn, contact a lawn care pro at GreenPal.
Powered by Froala Editor


