
How to Test Your Lawn’s Soil
Soil is the foundation of your lawn. When you apply fertilizer and soil amendments without testing first, you risk throwing your lawn’s health off balance. We’ll show you how to test your lawn’s soil step-by-step so you can amend it the right way.

An affordable, easy, and effective way to test your soil is to send a sample to your local cooperative extension for laboratory testing. You’ll then receive detailed instructions explaining exactly what nutrients and soil amendments your lawn needs to thrive.
What You’ll Need
Soil probe (recommended), shovel, or spade
Knife or trowel (if using shovel or spade)
Bucket
Permanent marker
Soil sample bag provided by your local cooperative extension OR a resealable, quart-sized freezer bag
Printed soil sample forms provided by your local cooperative extension
Test Your Lawn’s Soil in 5 Easy Steps
Step 1: Decide Areas to Test
A soil sample should reflect the average fertility of the lawn. That means, don’t collect soil from the best parts of the lawn or its worst parts.
If there’s a part of the lawn that’s underperforming and doesn’t represent your lawn’s average performance, test that area separately.
Areas that are managed and used separately should also be tested separately. For example, don’t mix soil collected from the front lawn with soil collected from the backyard. Both areas are usually used differently, so they should be tested separately and considered different testing areas.
Repeat the collection and sending process (steps 2 through 4) for each test area you identify.
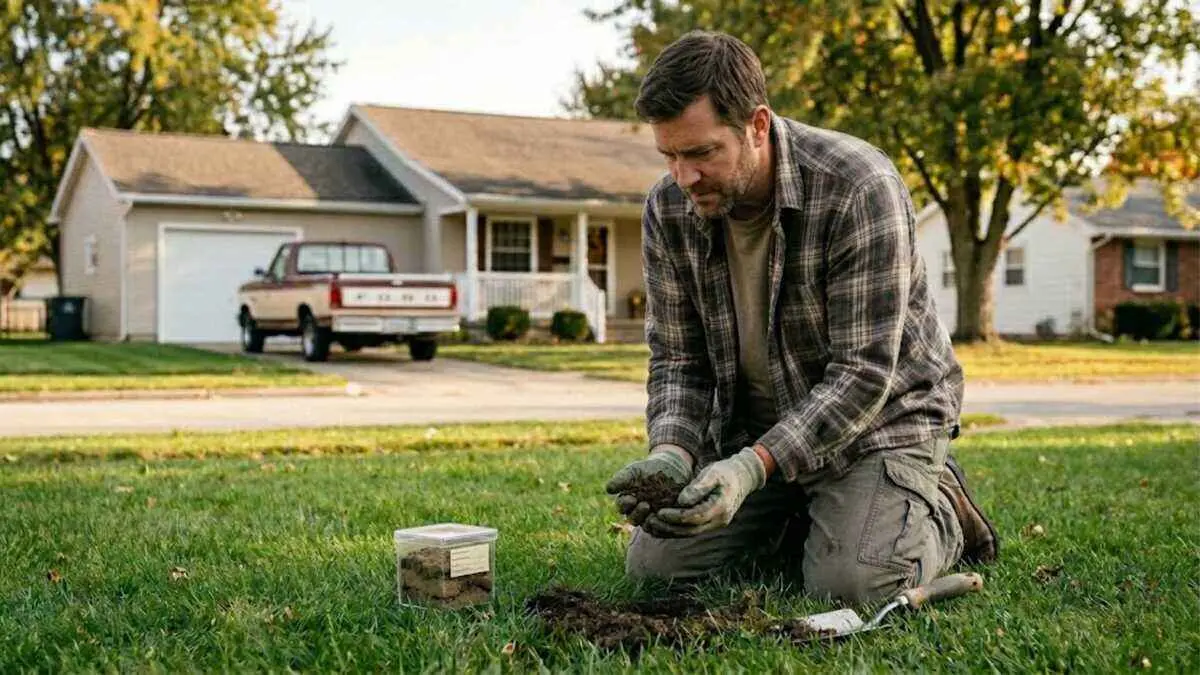
Step 2: Collect Subsamples From Test Area
Tip: To make the job easier, soften hard soil with water to make it moist, but not wet.
A soil sample is made up of several subsamples collected throughout the testing area. Collect a subsample from 10 to 15 different locations of the testing area using a soil probe, spade, or shovel.
Place these 10 to 15 subsamples into a clean bucket and mix well. In total, you should have about 2 cups of soil.
If using a soil probe:
Insert the tool 6 inches deep into the ground and place the extracted soil into a clean bucket. Soil probes are the most convenient option because they collect the soil in a continuous core, don’t disturb the subsample’s soil layers, make the job go by faster, and don’t require digging large holes in the sampling area.
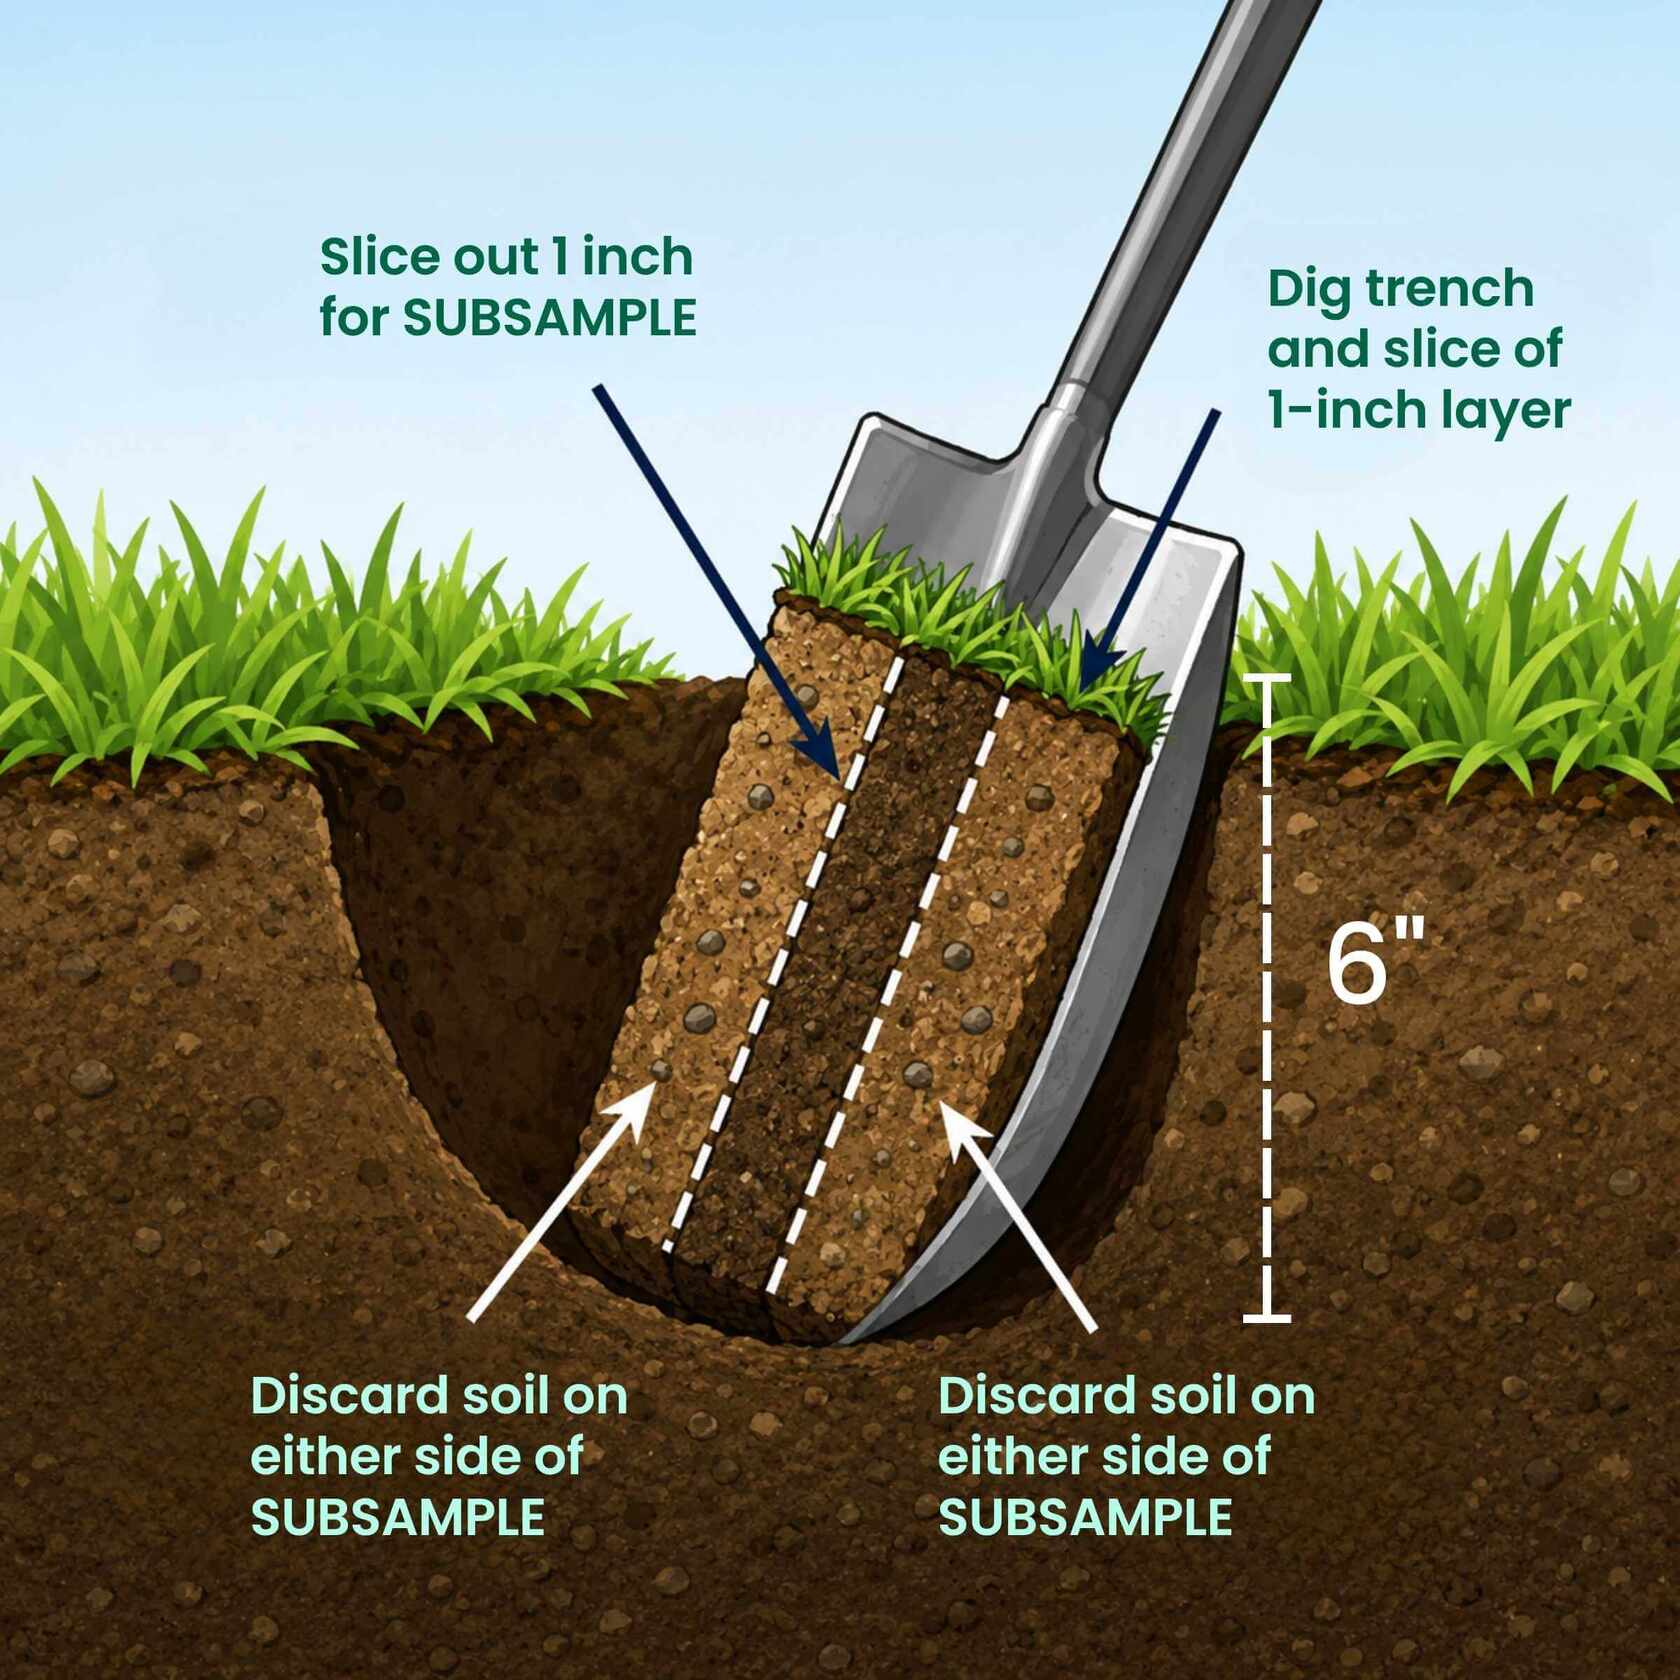
If using a shovel or spade:
Insert the tool 6 inches deep into the ground and then lift the tool full of soil, leaving a D-shaped hole in the ground.
Insert the tool into the hole once more, this time cutting a 1-inch thick slice of soil from the straight side of the hole. You now have a 1-inch thick slice of soil to sample from.
Use a knife, trowel, or your hands for this next step: In a straight line, gently remove and discard both sides of the slice to create an approximately 1-inch vertical strip from the center (which will be the subsample). As you cut, make sure all the soil layers are included.
You now have a 1-inch thick, 1-inch wide, and 6-inch long subsample. Place it into a clean bucket.
Step 3: Dry the Soil Sample
After mixing the subsamples, allow the soil to dry. Air-dry the soil within 24 hours, without raising the temperature above 120°F.
Some cooperative extensions accept moist soil and will dry it for you, while others may charge extra to dry it. If you’re unsure, read the instructions provided by your local extension office.
Step 4: Send the Sample
Place the dried soil sample into a resealable, quart-sized freezer bag or the soil sample bag provided by your local cooperative extension.
Label the bag with a permanent marker (this is especially important if you’re collecting multiple soil samples).
Download and print the soil sample form provided by your extension. Fill out the form and provide the necessary information, such as what kind of grass your lawn has and how old it is.
-
Finally, mail the soil sample and its corresponding form to the soil testing laboratory.
( GreenPal Marketplace )Get 5 free bids from local lawn prosTop-rated pros near you send real quotes in minutes — no contracts, no haggling.Get My Free BidsNo credit card required. Get matched in 60 seconds.
Step 5: Analyze Results
Soil tests results are usually available within 1 to 2 weeks. These results may reveal the following:
What amendments to apply to adjust the soil’s pH level
Nutrient levels of nitrogen, phosphorus, and potassium
Fertilizer recommendations, such as what NPK ratio to use
What rate to apply products throughout the year
The soil’s physical properties, such as whether it’s mostly clay or sand
Organic matter levels
If you’re having trouble reviewing the results, call your cooperative extension’s office for assistance.
Frequently Asked Questions About Soil Testing
How Much Does Soil Testing Cost?
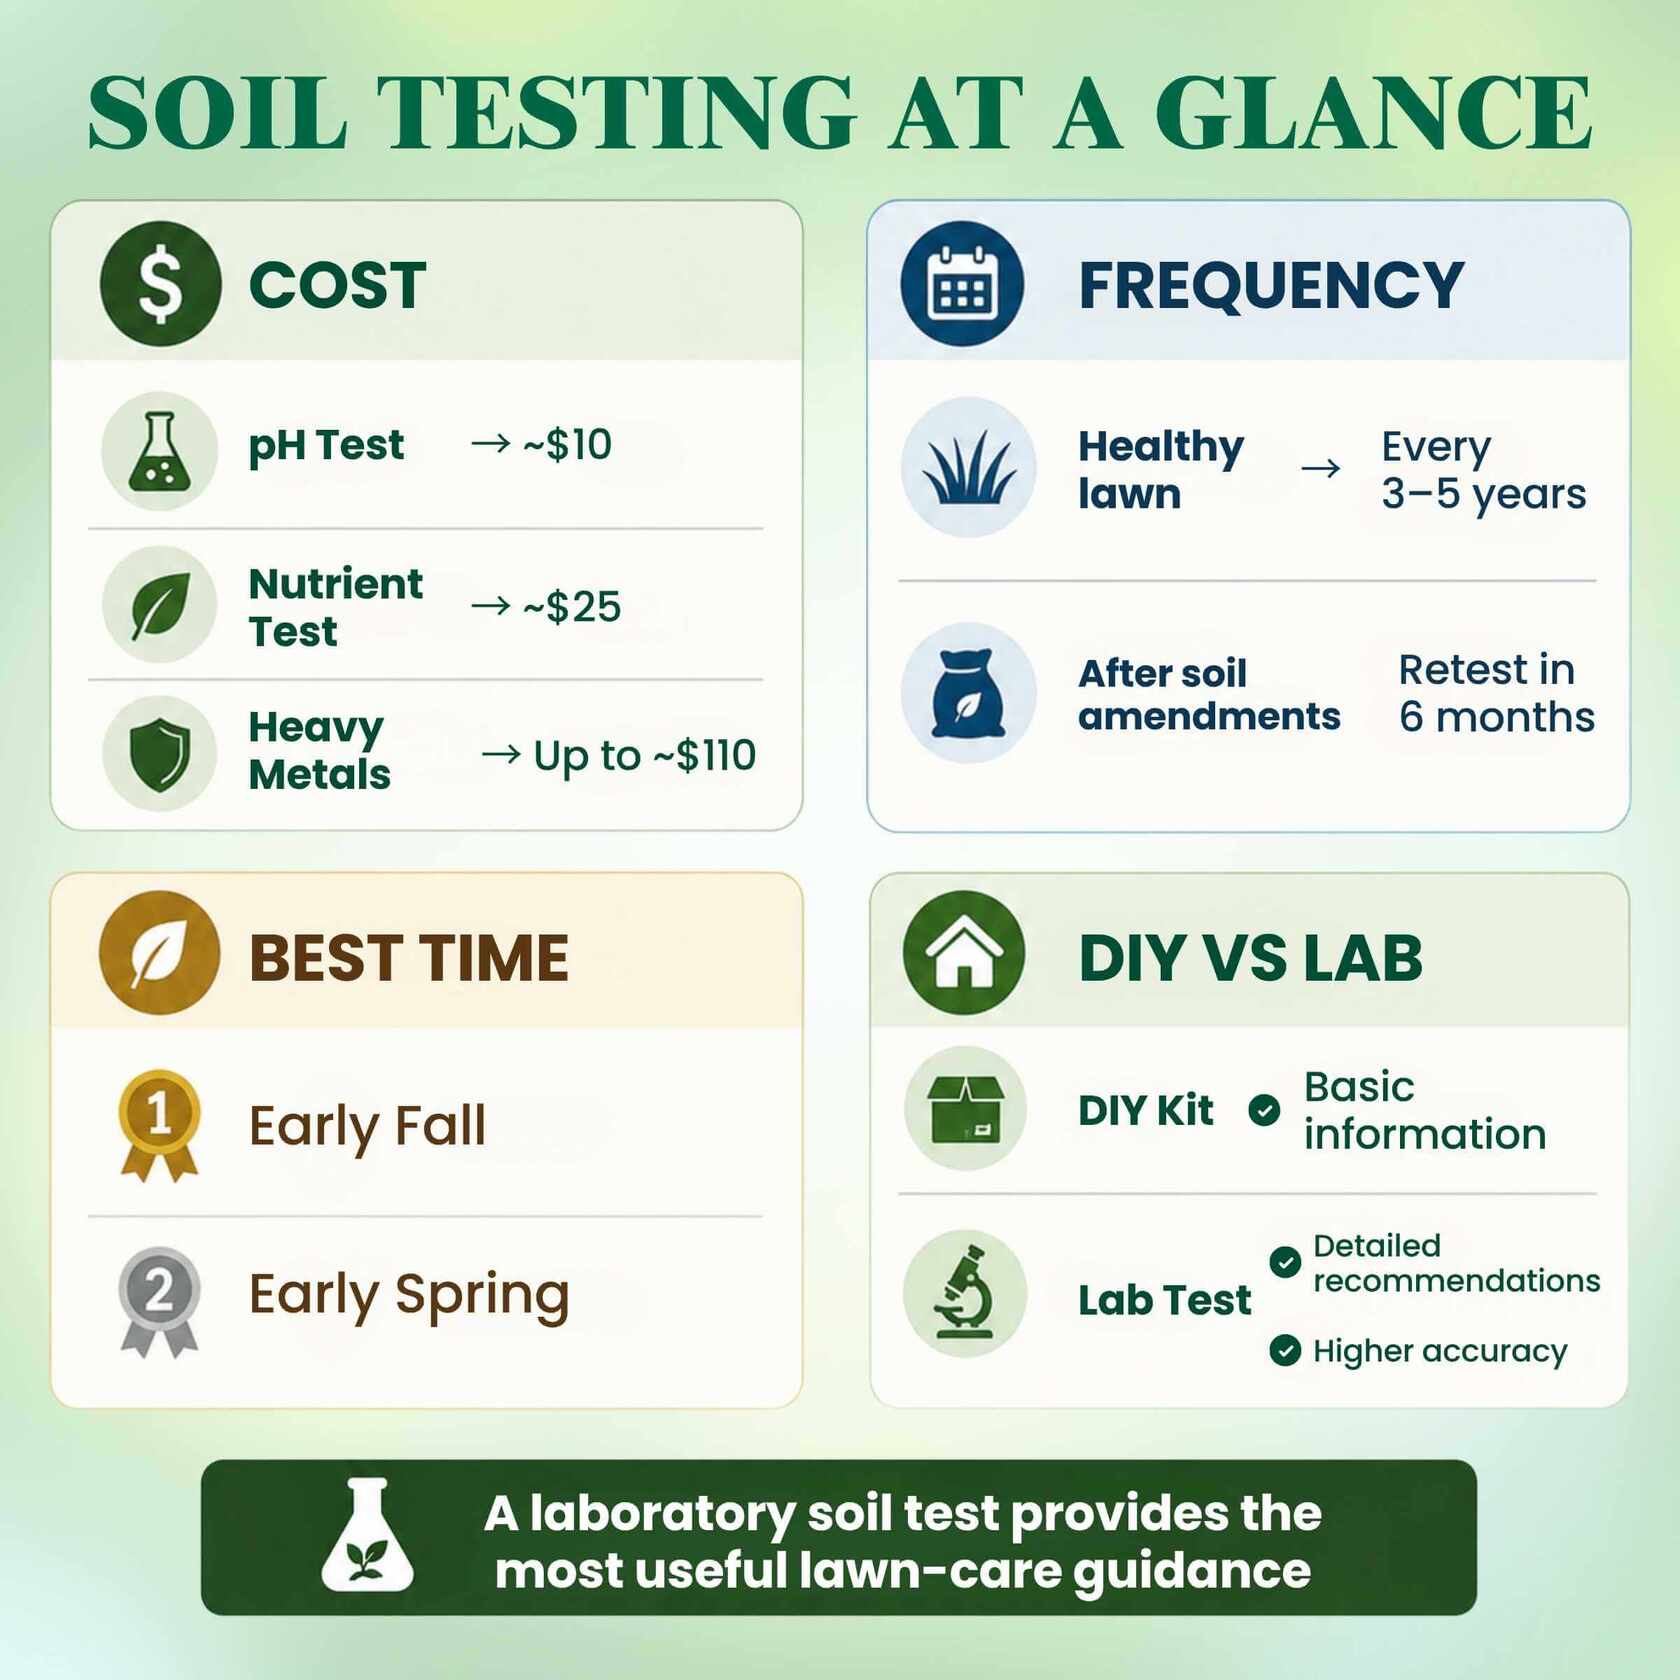
It depends on what you’re testing for. A soil pH test typically costs around $10, while a soil nutrient test costs around $25. On the higher end of the scale, testing the soil for heavy metals and contaminants can cost as much as $110.
How Often Should I Test My Lawn’s Soil?
For most healthy lawns, soil testing every 3 to 5 years is sufficient.
If you’ve amended the soil — such as added lime or sulfur to change the pH level — retest in about 6 months to allow the amendment to take effect. After that, continue testing once per year until the desired level is reached, then retest every 3 to 5 years to maintain it.
When Is the Best Time to Test Soil?
Early fall is the ideal time to test your lawn’s soil, because it gives you plenty of time to purchase fertilizer and plan your lawn care schedule for the year ahead. It also allows time for soil amendments, such as lime, to take effect before spring growth arrives.
If you’re unable to test soil in fall, early spring is another good time to test the soil.
Can I Test Lawn Soil With a DIY Soil Test Kit?
Yes, at-home soil testing kits are widely available for purchase and can reveal soil pH levels and some nutrient deficiencies. However, these tests typically won’t provide actionable instructions on how to amend the soil and are not as precise as laboratory tests.
Find a Lawn Care Pro Near You
Soil conditions vary across the United States, so treatments that work for one lawn won't necessarily work for another. For example, lawns in Seattle, WA often contend with acidic soils, while lawns in Detroit, MI lean more alkaline — two very different starting points that call for very different treatments. A laboratory soil test shows you where to start with your own lawn.
Getting to know your soil and its unique properties is one of the best things you can do for your lawn's health. And while you're enjoying the results, a local lawn care professional can handle the mowing as your lawn thrives.

